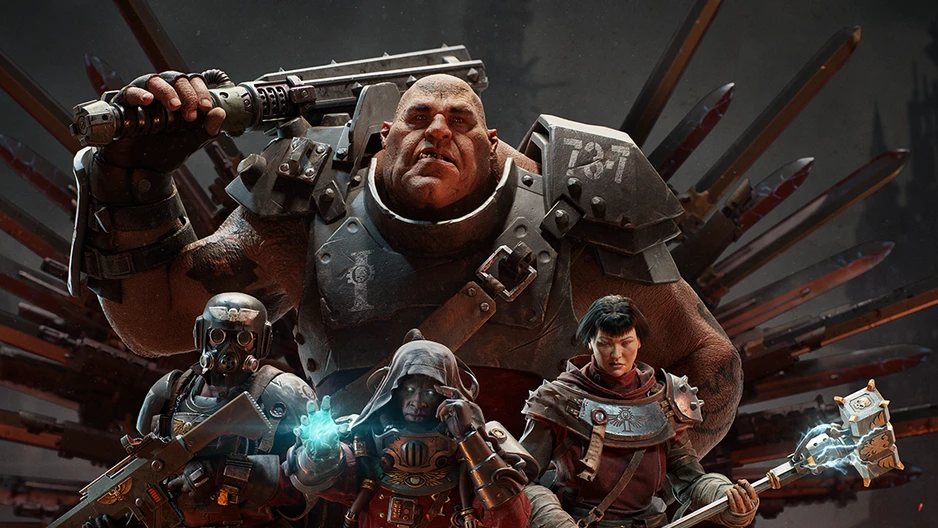
Darktide Enemies List Guide
Table of Contents
This guide will list all of the enemy types in Warhammer 40K: Darktide, including special enemies, elite enemies and bosses.
Important: Visit our In-Depth DARKTIDE ENEMIES List.
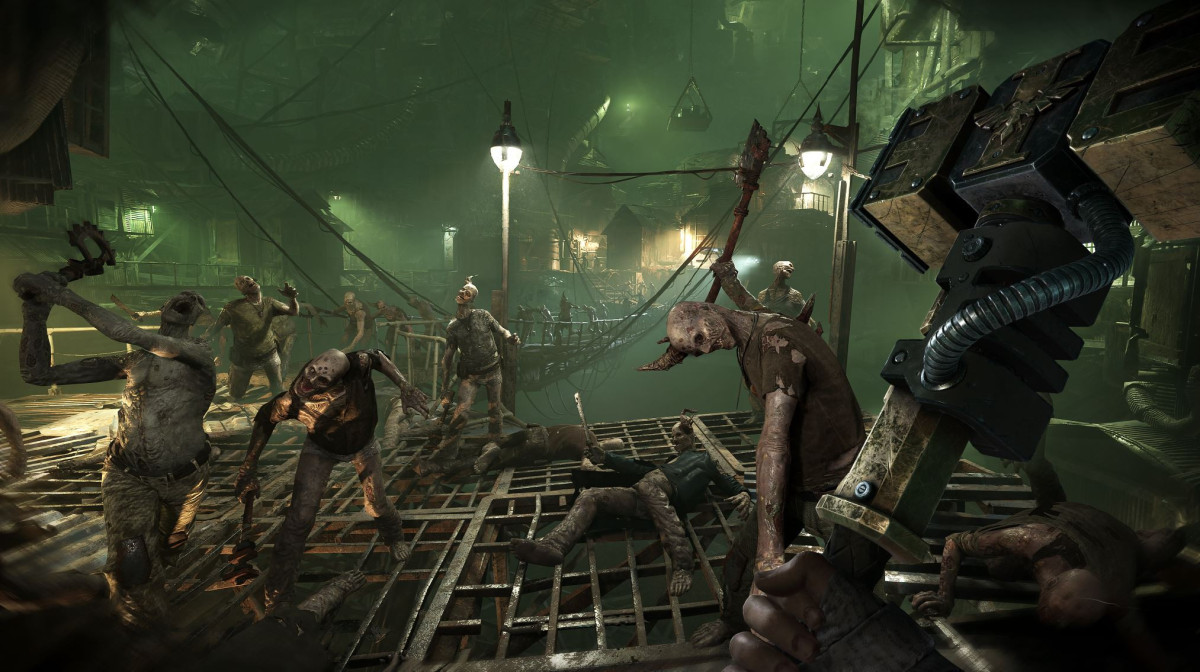
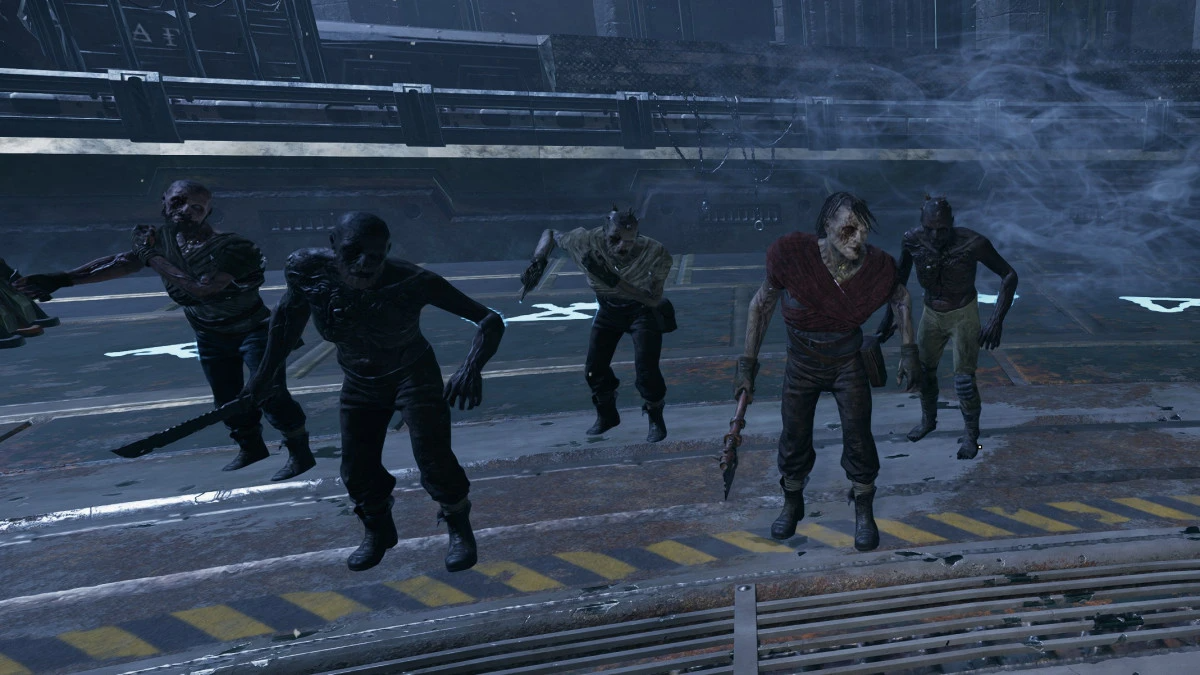
Horde and Ambient Enemies
Horde enemies are usually the most numerous enemy type in a game. The game will periodically spawn a large number of horde enemies to attack your party, from multiple directions if possible. It is wise to utilize chokepoints to defend against this more easily.
You can also find horde enemies stood around throughout levels in Darktide (ambient enemies) and they will attack you when you get close to them.
Alone or in small groups they are no threat at all, but in large numbers or in combination with other enemy types they can be a greater problem.
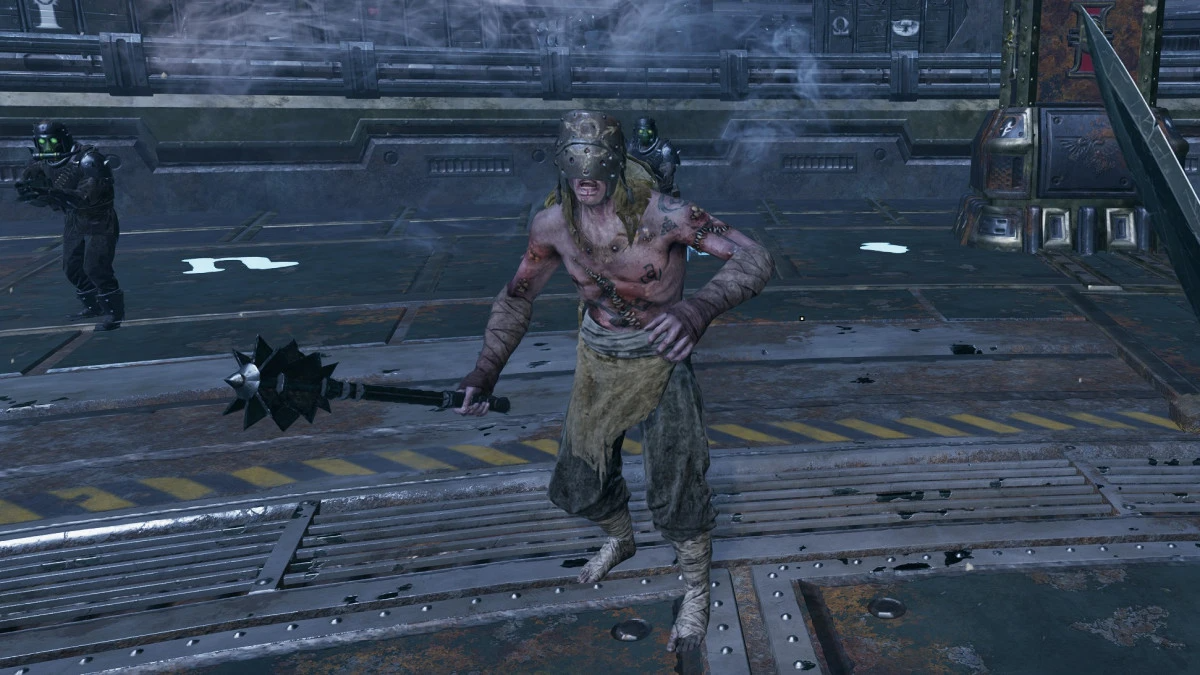
Poxwalkers
The most common horde enemies are called Poxwalkers, armed only with a crude melee weapon. They have low health and very low stagger resistance, but can be a problem when in large numbers and mixed with more dangerous enemies.
Groaners
Groaners are pretty much stronger versions of Poxwalkers. They often moan or shout incoherently before attacking you, and are dressed in civilian clothing. They are a little stronger than Poxwalkers but still very weak and shouldn't cause many problems on their own.
Dreg Bruiser
Dreg Bruisers are a stronger horde enemy. They are also melee focused, using a one handed maul to attack players. They work in a similar way to Poxwalkers but are more sturdy and deal a little more damage if they hit you.
Dreg Stalker
Dreg Stalkers are ranged focused ambient enemies, and can cause problems in large numbers because they drain players toughness by shooting at you from a distance. When you get close to them they switch to a sword.
Scab Bruiser
A little stronger than their Dreg Bruiser counterparts, mostly due to the Flak Armour that they wear. Scab Bruisers can sometimes be found in large numbers. They usually aren't especially dangerous and you can deal with them quickly by aiming for the unarmoured head.
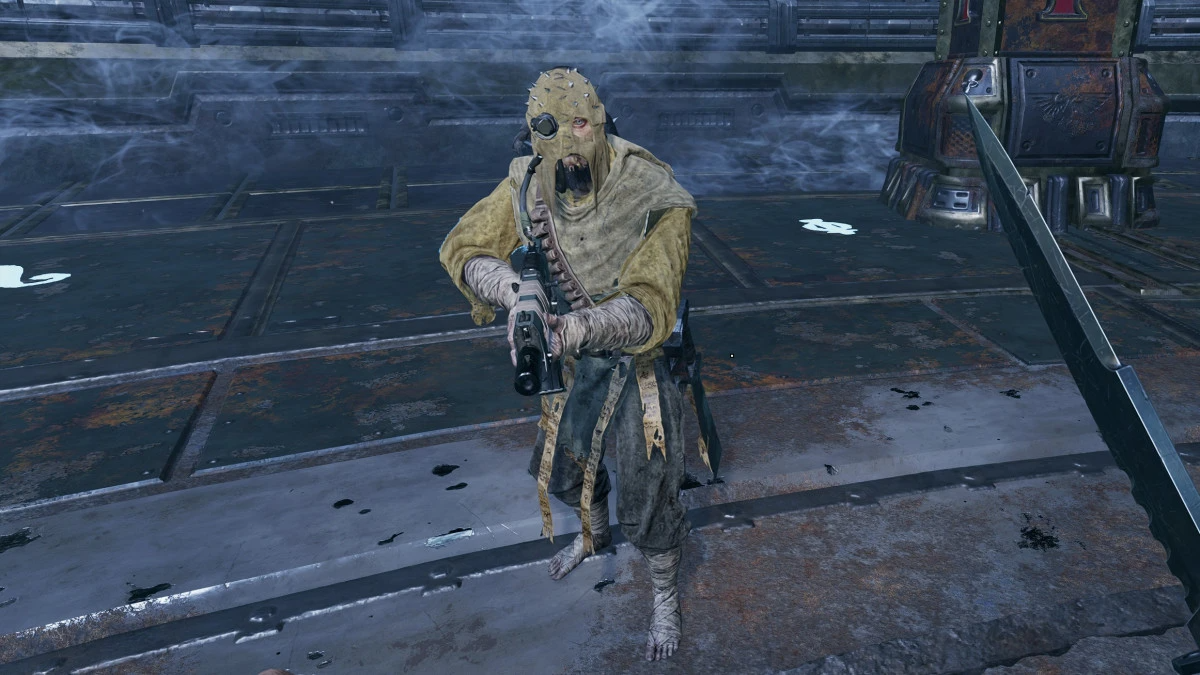
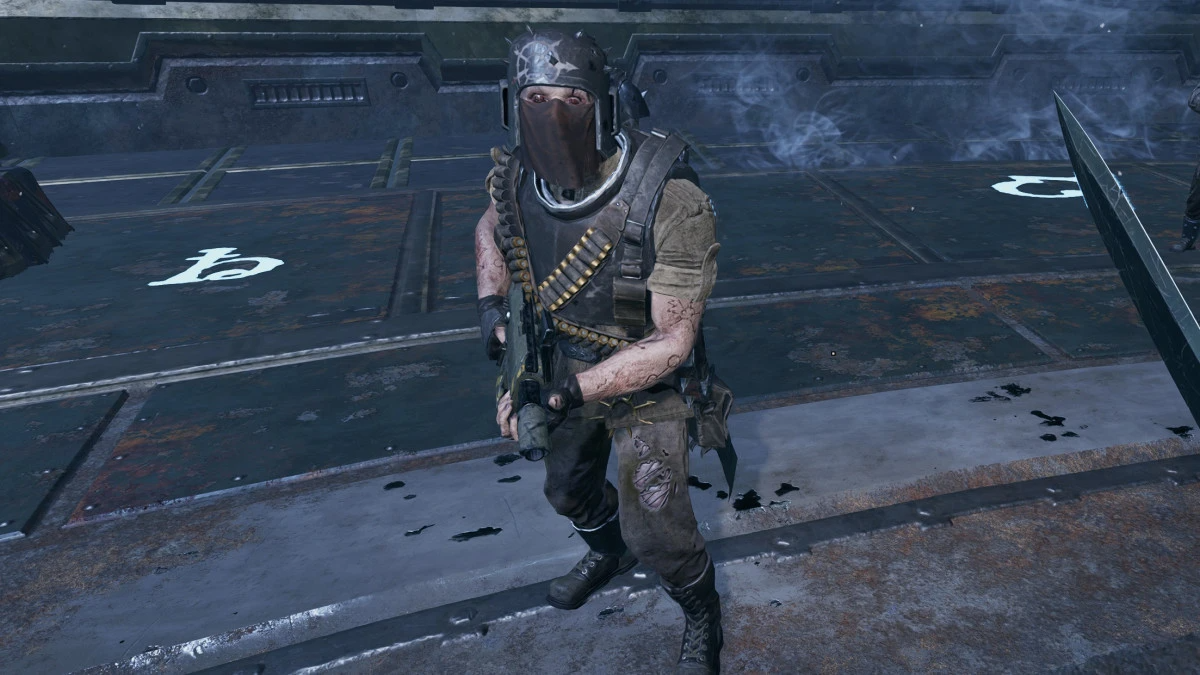
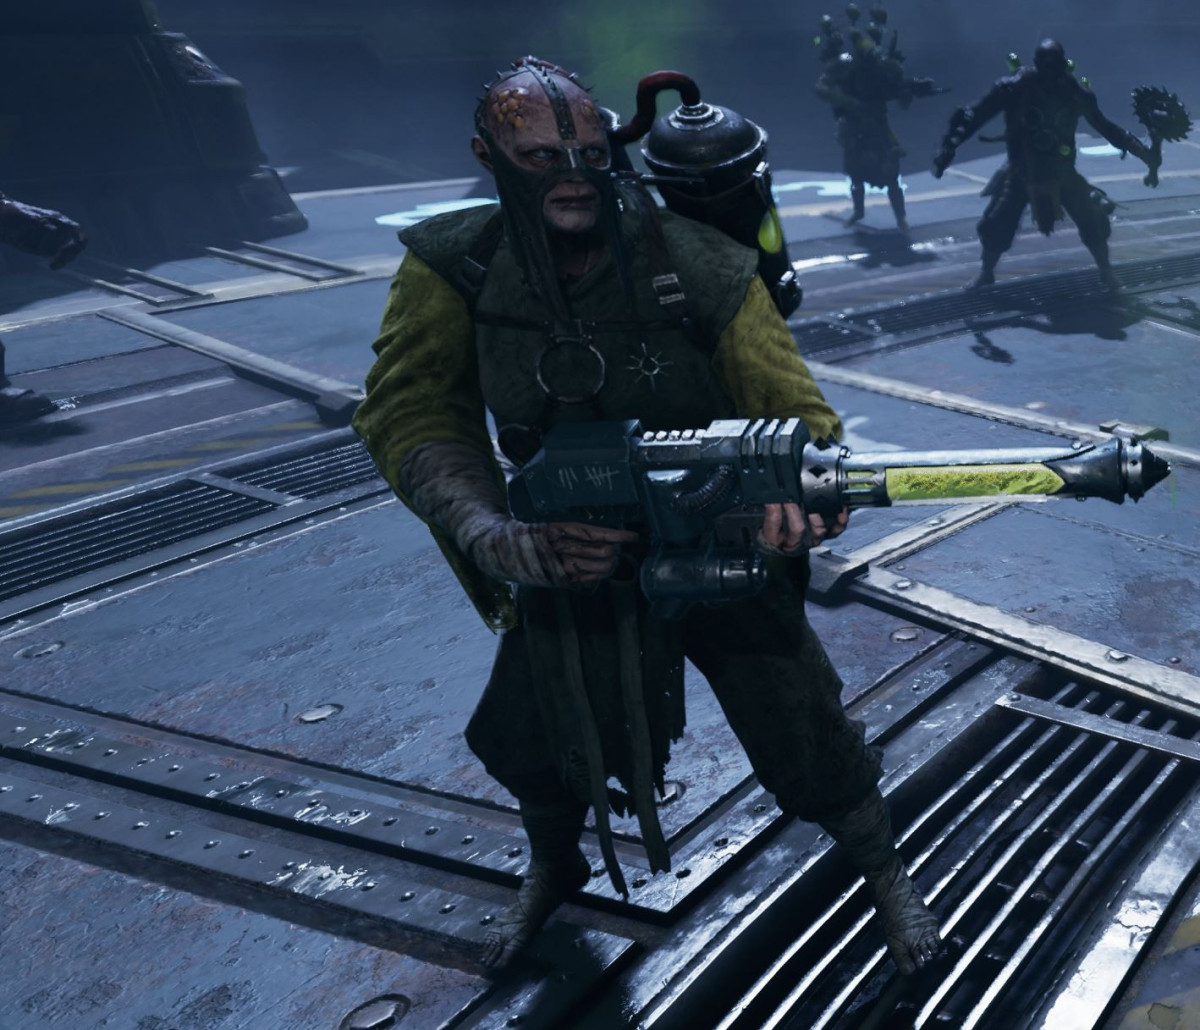
Scab Shooter
Scab Shooters are armed with a laspistol and will try to target players from range, often ducking behind cover when they are able to do so. They are arguably the most dangerous enemy in this category due to their tendency to spawn in large numbers are drain your Toughness while you are distracted by hordes or elite enemies. When you get close to them they will attack you with a bayonet. They are mostly covered with Flak armour, but their legs are unarmoured.
Scab Stalker
Very similar to the Scab Shooter, they also tend to hang out in groups and will use cover when available, aiming to damage you from a distance. Their head and torso is protected by Flak armour, but they are otherwise unarmoured. In melee they will switch to a sword.
Specialist Enemies
Specialist enemies, often referred to as "specials", are enemies that are programmed to behave in a certain unique way, with a goal of disrupting your party with methods such as disabling a party member (preventing them from moving or attacking until they are assissted by an ally), pinning you down or doing high damage with gunfire, or area denial.
Specials aren't too dangerous on their own, but when there are multiple special enemies mixed in with a horde or a cluster of elite enemies, you can very quickly run into problems. Therefore its generally a good idea for at least one player in a party to have their build focused on sniping specials.
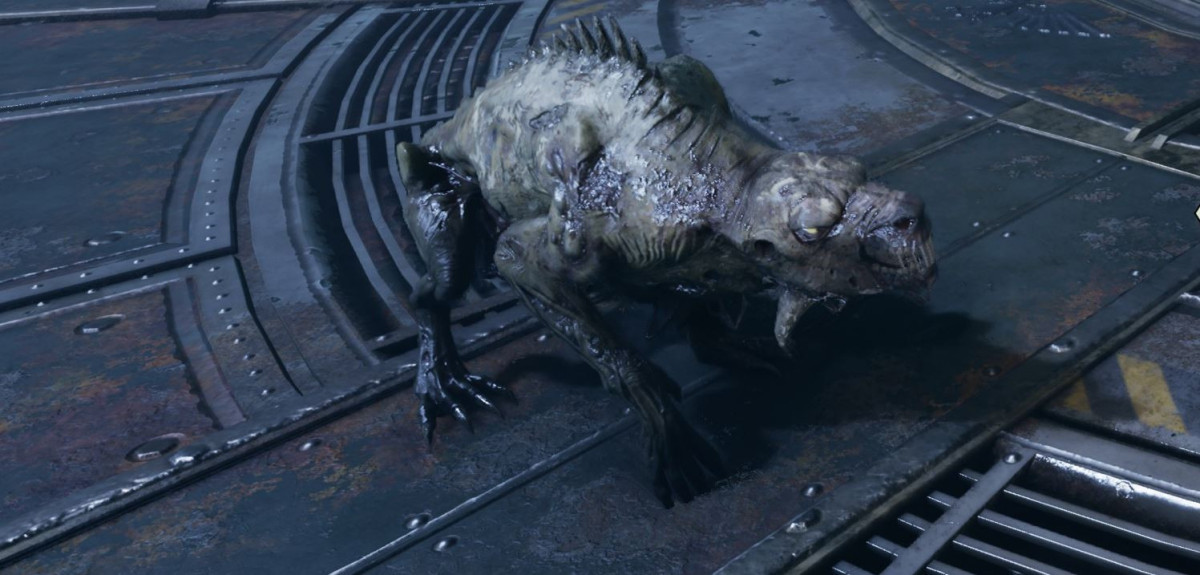
Pox Hound
Pox hounds move around quickly and erratically, and their goal is to pounce on an isolated party member. The pounced player cannot break free and will take continuous corrupting damage until freed. You will hear when the Pox Hound spawns due to a howl in the distance, and it should always be a priority target as soon as it's in range.
You can dodge to the side to avoid the pounce of the Pox Hound - it just takes a bit of practice to get the timing right. The audio cue for dodging the Hound's pounce is a high pitched bark that it always emits as it begins to pounce. Dodge sideways when you hear this.
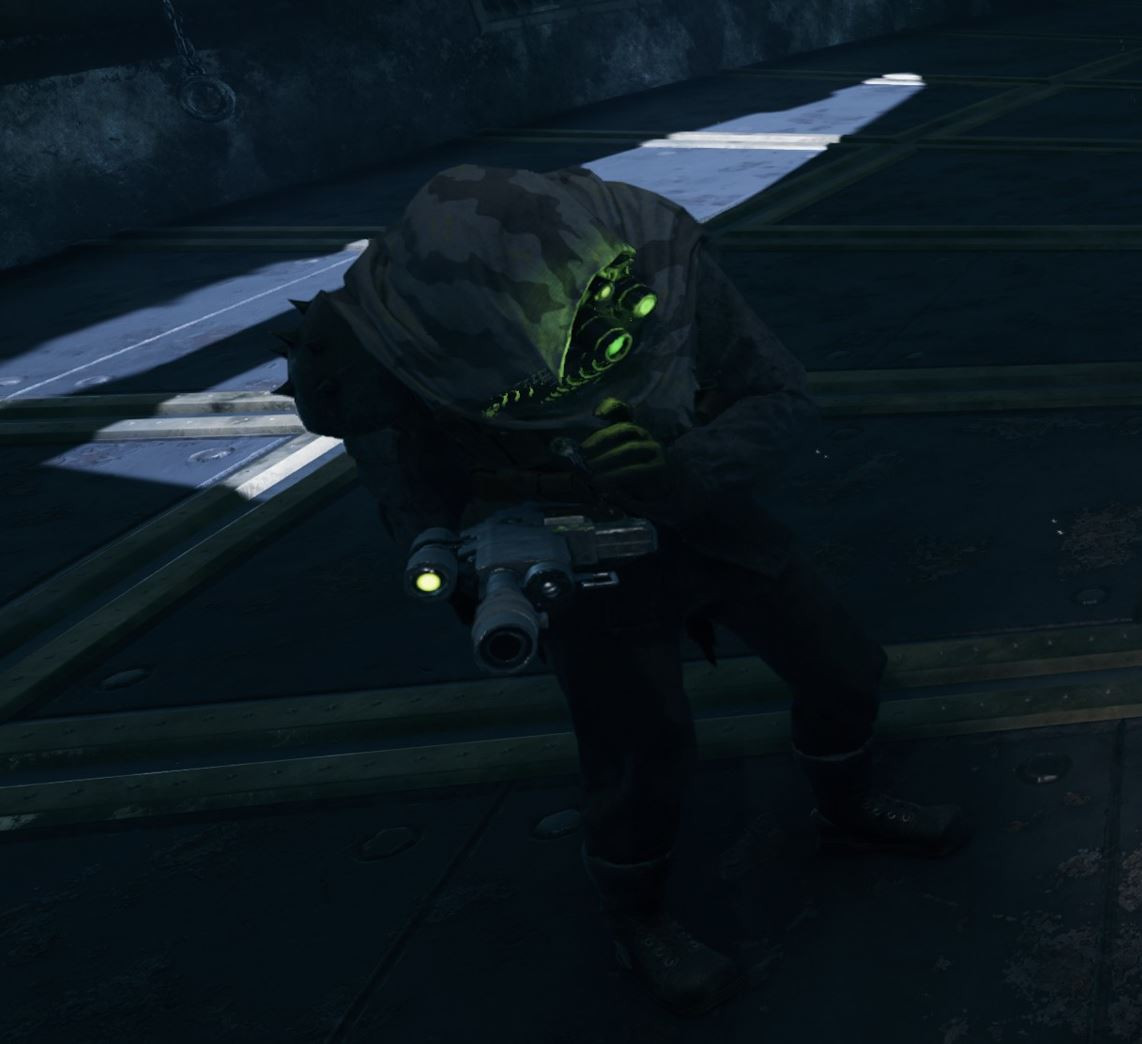
Scab Trapper
Trappers have a similar goal to the Pox Hound - their aim is to stun a party member by shooting a net which will trap you. The trappers don't make much noise and will sneak around and hide, waiting for an opportune moment to strike, often running away to find a new hiding spot when they have fired their net. The trapper's net does very slow corrupting damage over time, but trapped players will often fall victim to other enemies if they are not freed quickly, as they are unable to move or defend themselves.
The net can be dodged - ideally wait for the first clicking sound as he begins to fire the net, and then dodge sideways.
Shotgunners
Shotgunners come in two varieties, Scab shotgunners and Dreg Shotgunners. Shotgunners do heavy damage with their shotgun and close range, which can very quickly destroy your Toughness and Health bars. To deal with them you should either pick them off from a distance or quickly get into melee with them before they can shoot.

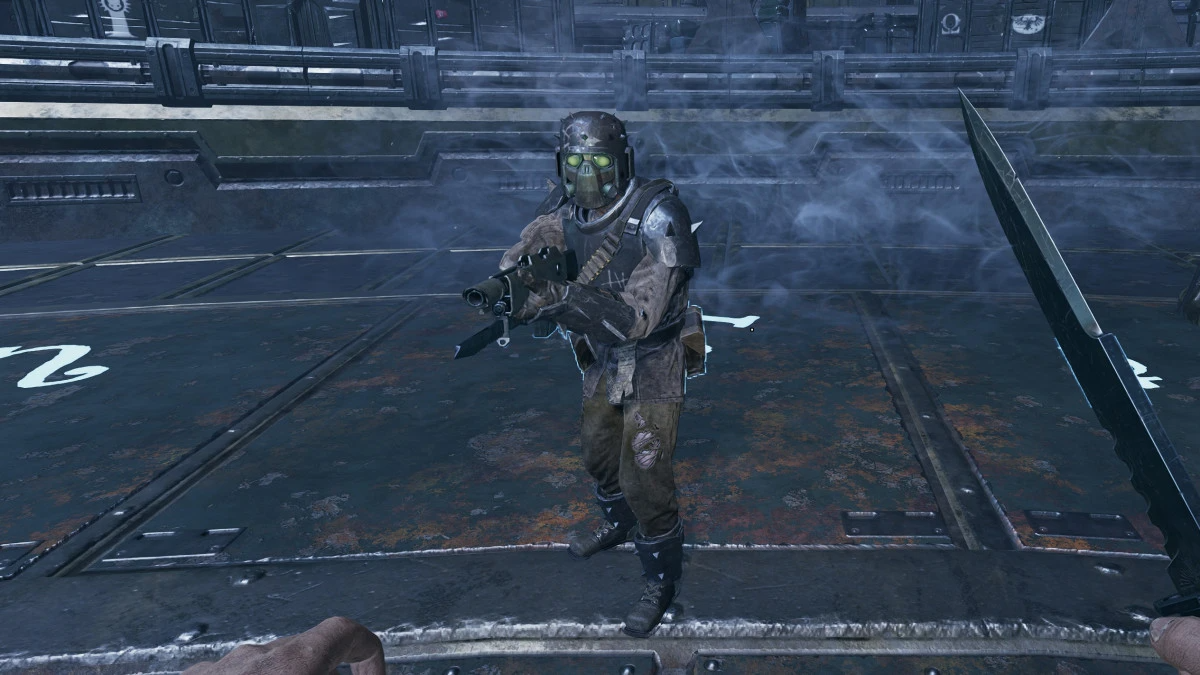
Gunners
Gunners come in two varieties, Scab Gunners and Dreg Gunners. Both can cause serious problems for your party if left unchecked, especially if there are several of them. They will target players with rapid medium range fire that can stagger you and does considerable damage.
Flamers
Flamers also come in two varities, Scab Flamers and Dreg Tox Flamers. The Dreg Tox Flamer is noticeable by the green fire it produces from its flamethrower.
Flamers do steady AOE damage to players and can act as an area denial threat. Another noticeable feature of fire damage is that it immediately removes all of your toughness, leaving you vulnerable to health damage and staggering effects from both the flamer and other enemies.
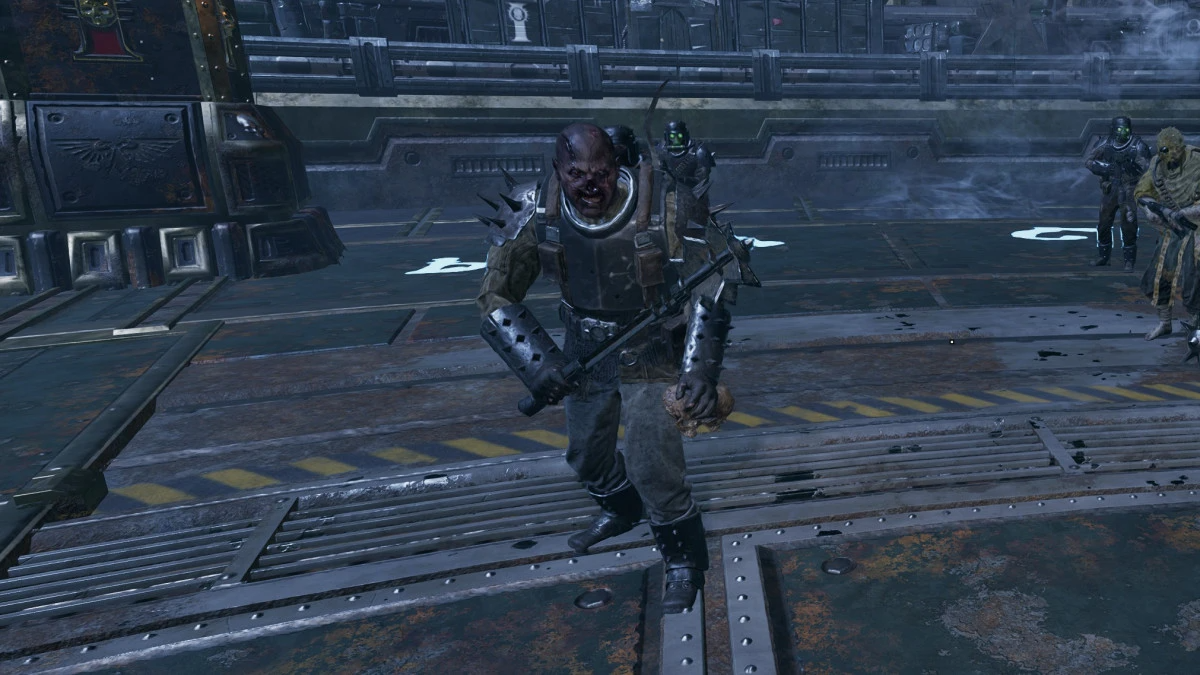
Mutant
Mutants will charge at someone in your party and grab them. They will then smash the player against the ground a few times before throwing them, which does quite a lot of damage to the victim and may throw them into a bad position (like in the middle of a horde). They are less dangerous than the Pox Hound and Trapper, but are quite disruptive and should still be a high priority target.
You can dodge their grab if you wait until they extend their arm to prepare to grab you, and then dodge sideways.
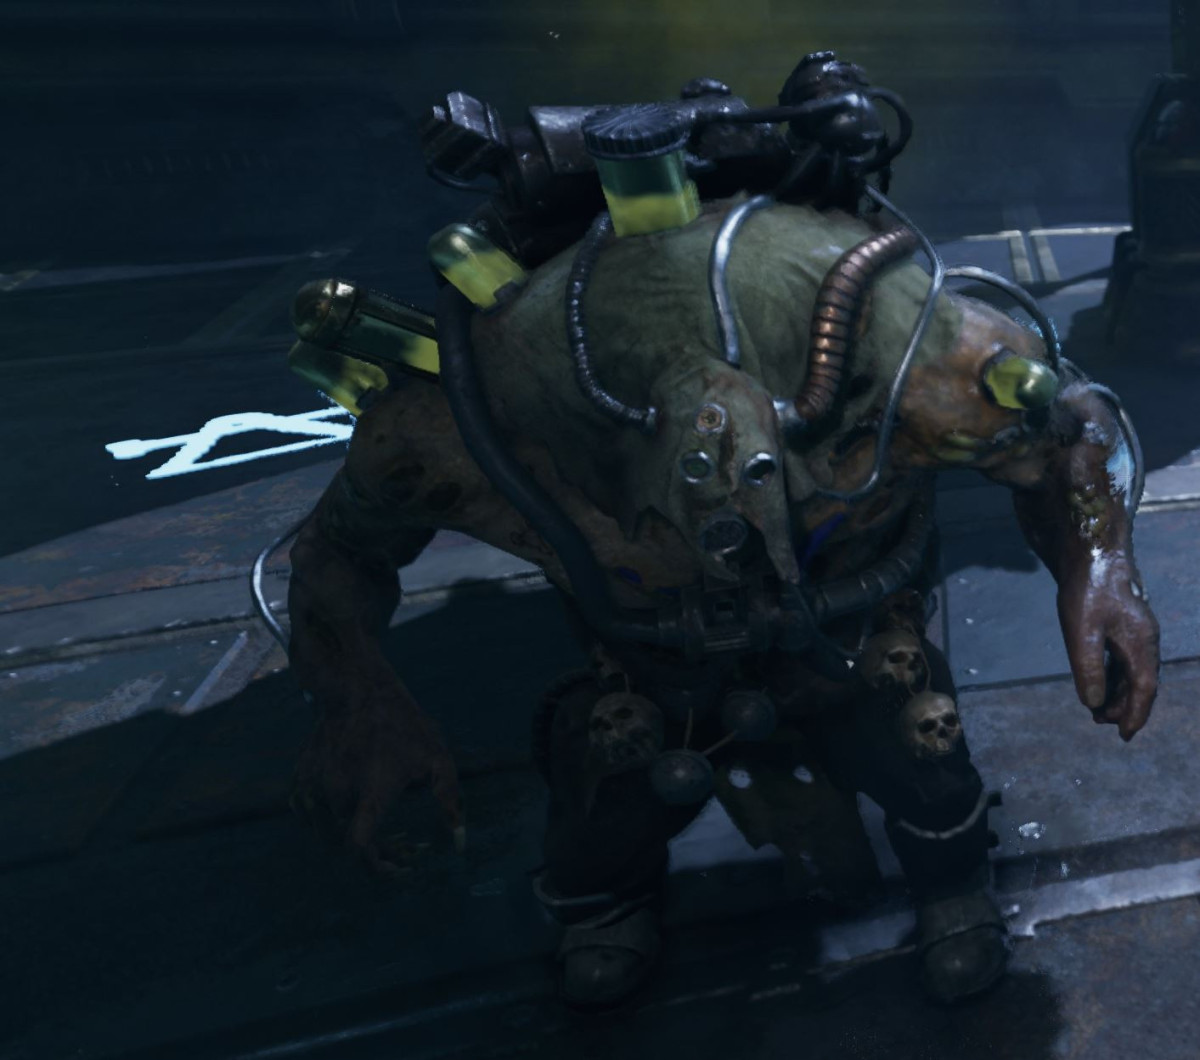
They're pretty hard to take down and their charge attack is difficult to dodge.
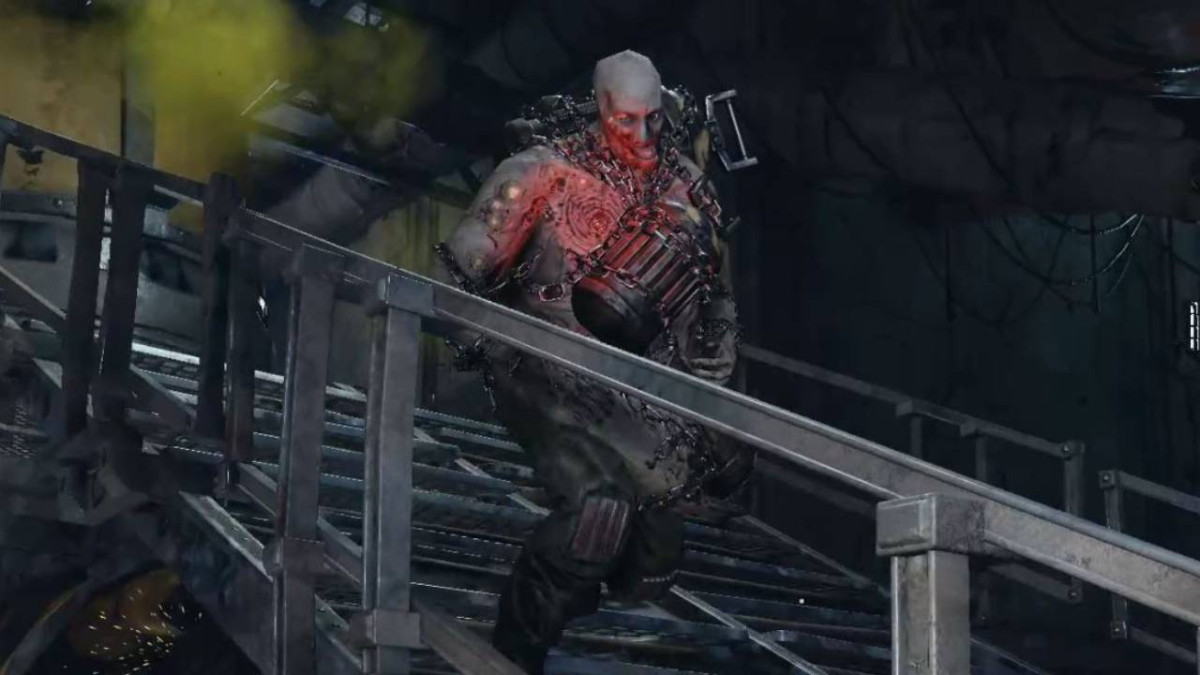
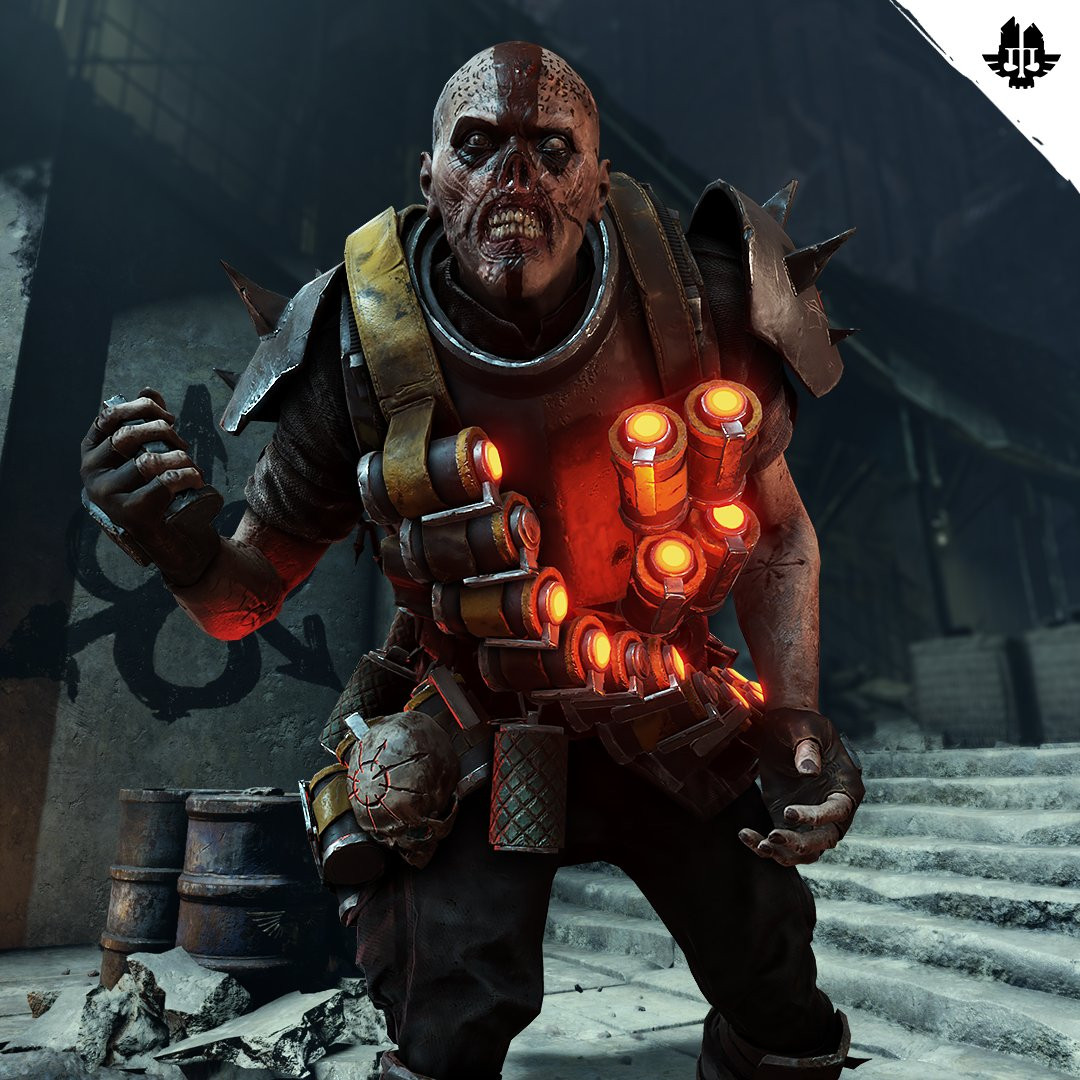
Pox Burster
Bursters will also charge at a player in your party, but unlike the Mutant they will blow themselves up on impact, doing high AOE damage. You should try to take them out from range before they can do this, but if that's not possible then it's best for the group to spread out in order to minimize the damage.
You can also bash the Pox Burster just before it hits you, and it will be knocked backwards before it explodes, doing no damage to you.
Scab Bomber
Scab Bombers will try to stay at a distance from your party, and will throw incendiary bombs at you, doing moderate damage but primarily acting as area denial. In a wide open area you can get away with prioritizing other targets if needed, but in more enclosed spaces they can be very dangerous and should be prioritized.
Scab Sniper
The Scab Sniper is a highly dangerous special enemy. If he's caught close to your party then he will sprint away to a distant position. From there, he will aim sniper shots at you. You can see where he is aiming from the sight laser, giving you a short window to dodge the shot. If he lands a hit on you, you will take massive damage - on higher difficulties, a couple of these shots can be enough to take down a player.
If someone on your team is able to snipe distant enemies, they should kill the sniper as soon as possible, otherwise you should utilize cover and alternative routes where possible to close the gap to the sniper.
Elite Enemies
Elite enemies are predominately melee heavy-hitters. They are often heavily armored and difficult to take down, and on higher difficulties you are likely to encounter groups of them. They are more resistant to the effects of stagger than smaller enemies, so they can pose a problem if not dealt with quickly and effectively. The Psyker's brain burst ability is a very efficient way of countering elite enemies, as it bypasses their armor and can take them out in one or two hits, depending on difficulty.
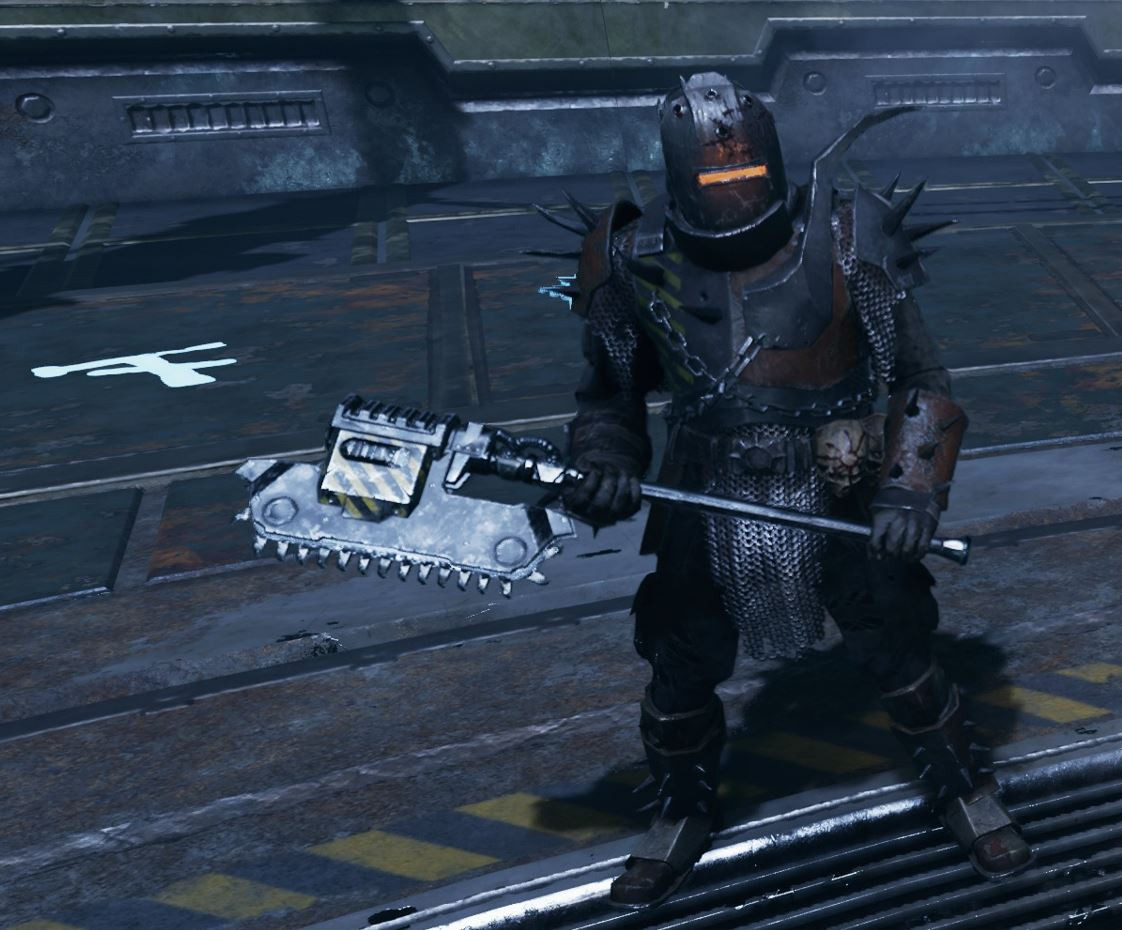
Scab Mauler
The Mauler is a very common elite enemy. They are heavily armored and wield a large chain axe. Their attacks are quite slow so you can avoid them by dodging. It's especially important to avoid their overhead strike - this is very slow but if it hits you it does huge damage.
The Mauler's helmet is made from strong Carapace Armour, so you are actually better off using body shots rather than headshots to take them down.
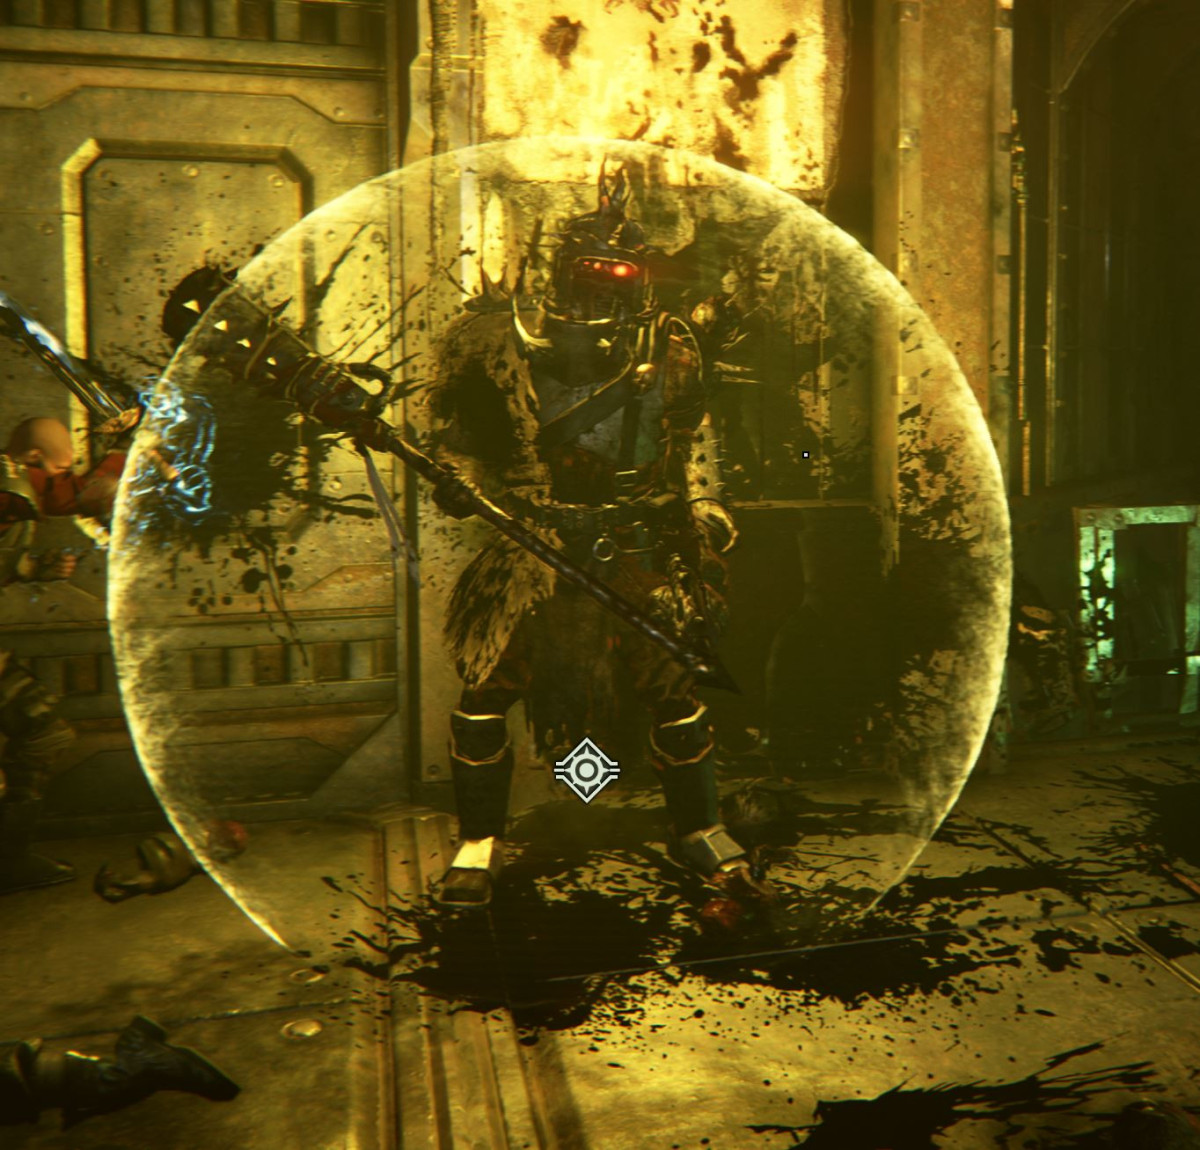
Crusher
The Crusher is completely encased in Carapace Armour. Their overhead strike deals massive damage and they are difficult to take down.
Alone they are not too dangerous as they are even more cumbersome with their movement and attacks - just make sure to dodge their heavy hitting swings. In groups however they can be much more deadly.
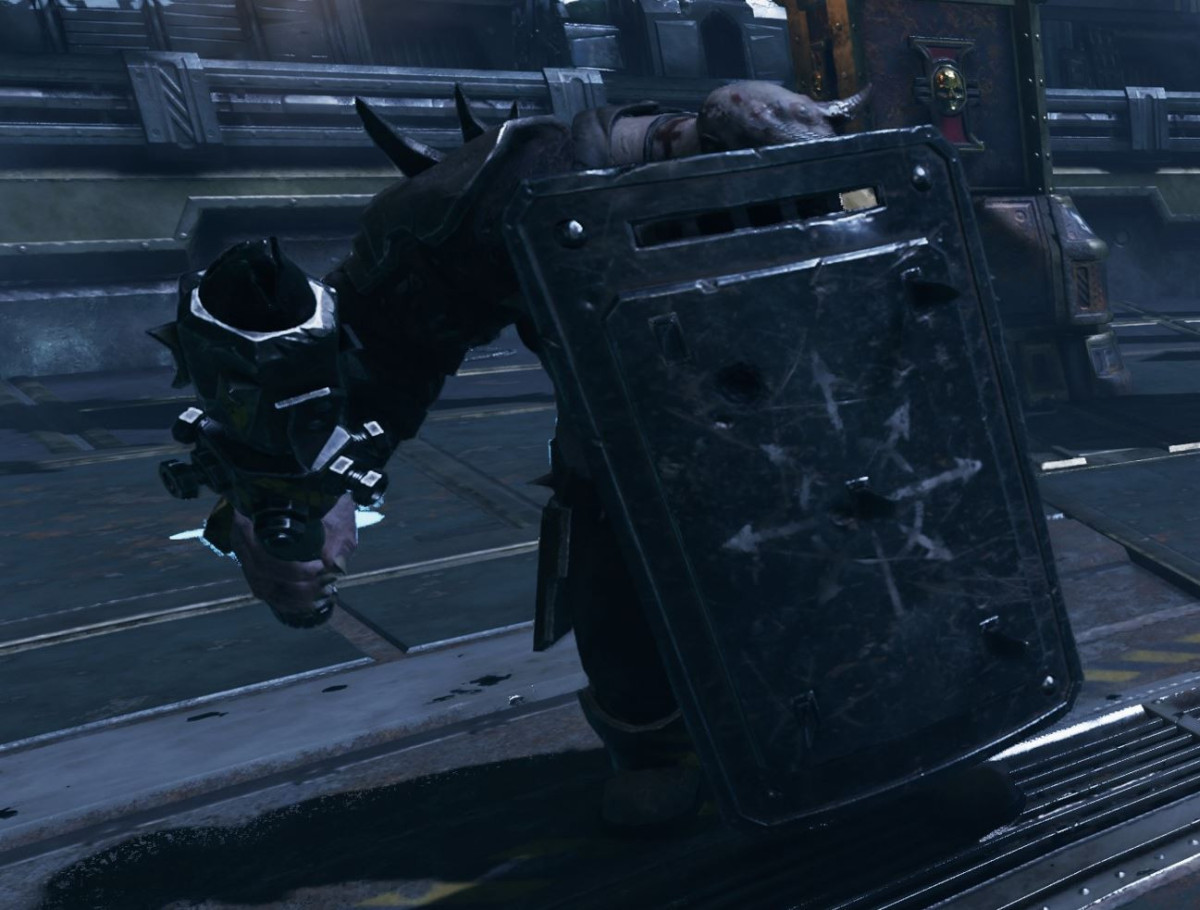
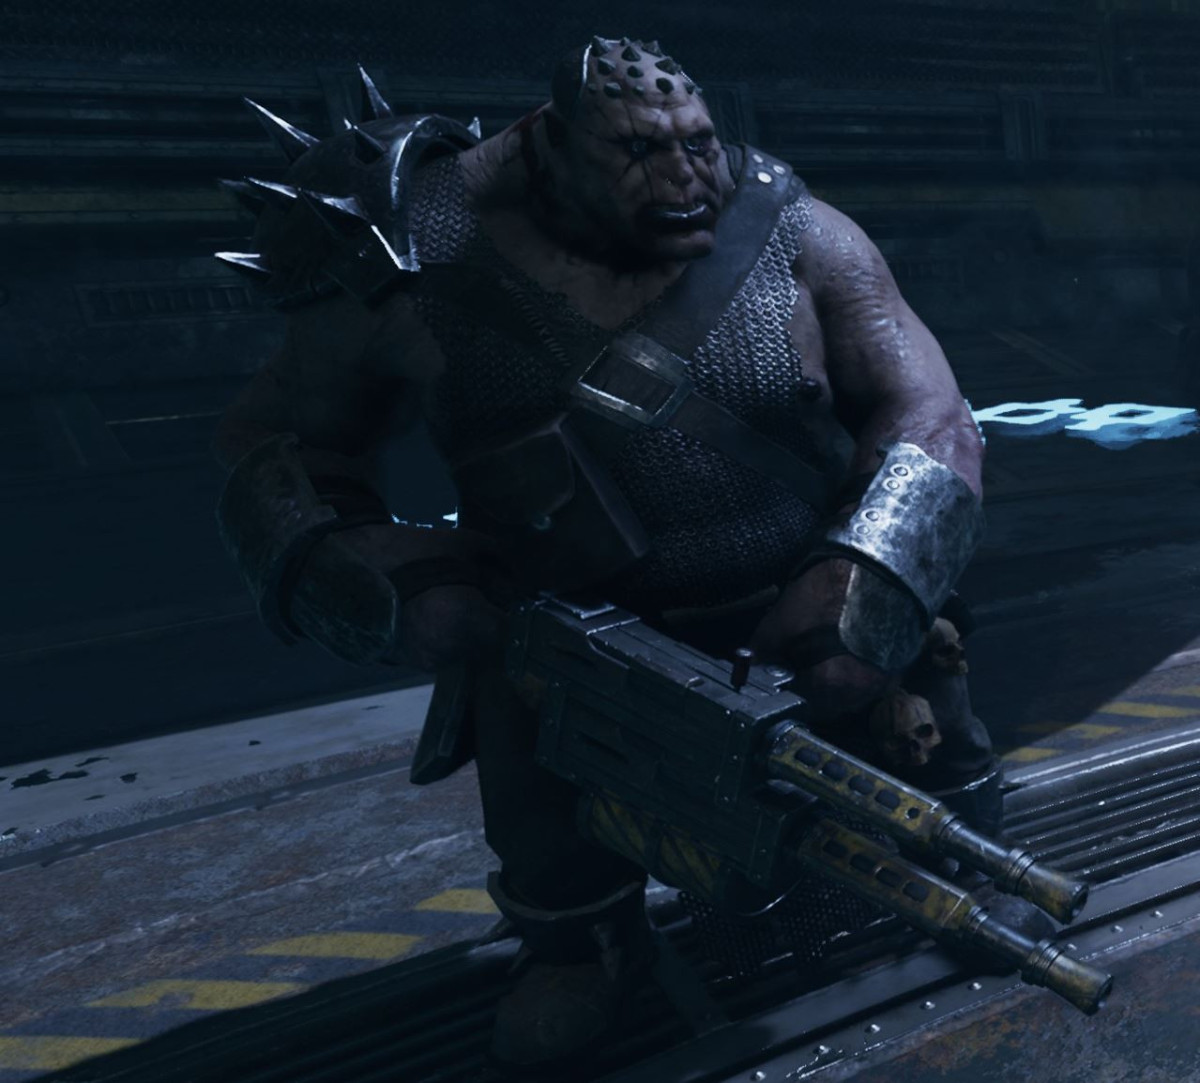
Bulwark
Bulwarks are Ogryns armed with a one handed weapon and a large shield. The shield protects most of the front of their body so it's difficult to damage them from the front. The best way to take them down is with teamwork.
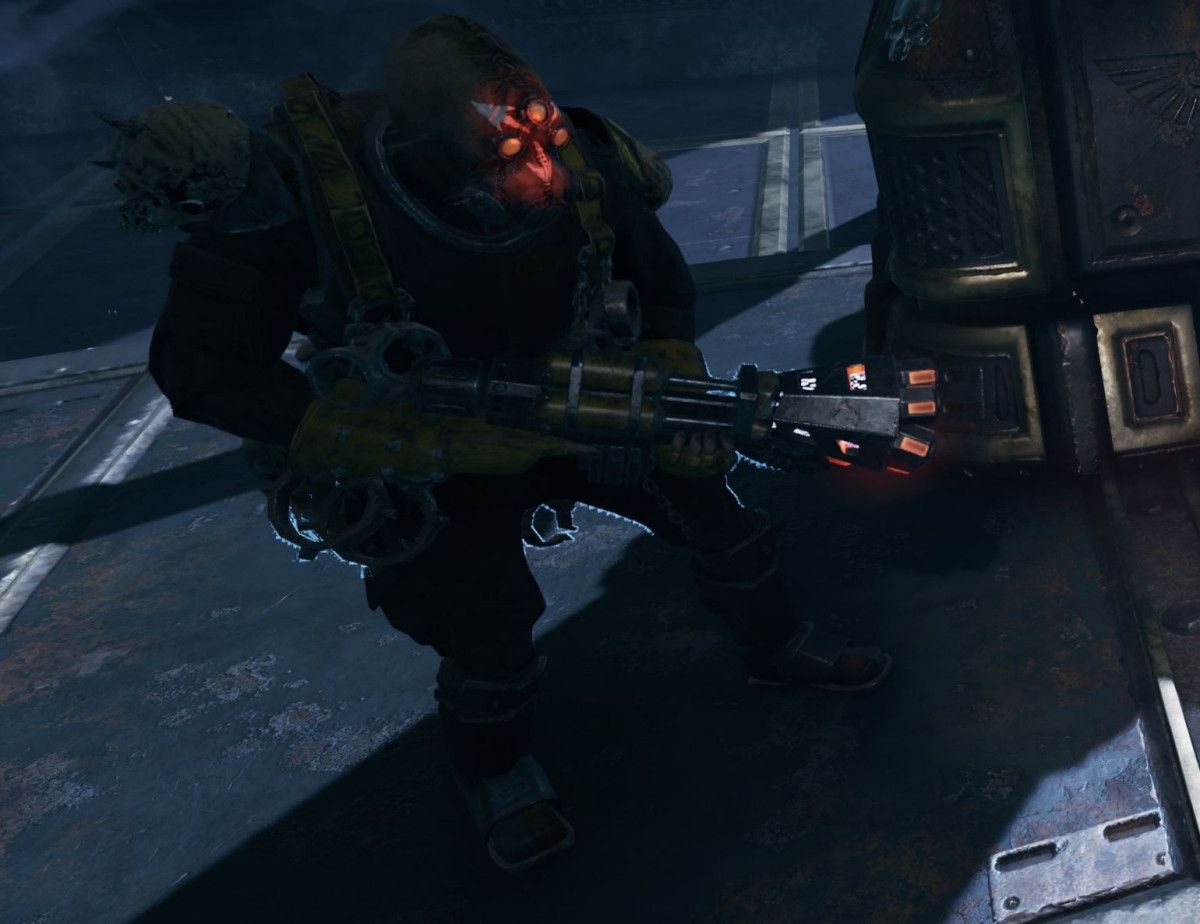
Reaper
Reapers are Ogryns armed with a huge automatic gun. You can stop them from firing by engaging them in melee. They have very high hitpoints so can be a bit tricky to take down. Their right shoulder and their forearms are protected by Carapace Armour, with Flak armour on their torso.
Dreg Ragers
Dreg Ragers are an unarmored berserker type enemy. They will attack relentlessly and are difficult to stagger.
The safest option when dealing with them is to take them out from range, as this allows you to avoid their troublesome melee attacks.
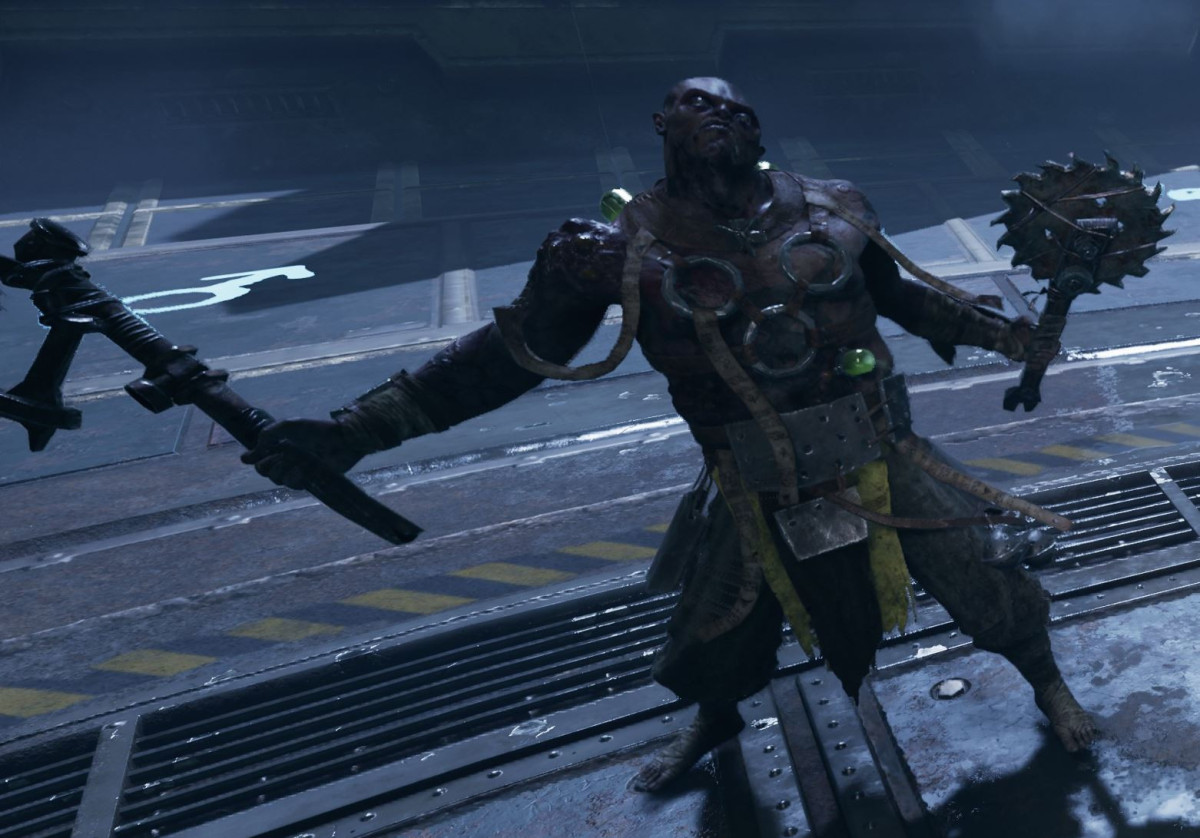
Scab Rager
Scab Ragers are similar to Dreg Ragers in terms of their behavior and attack patterns. Their main distinguishing feature is that they wear Flak Armour.
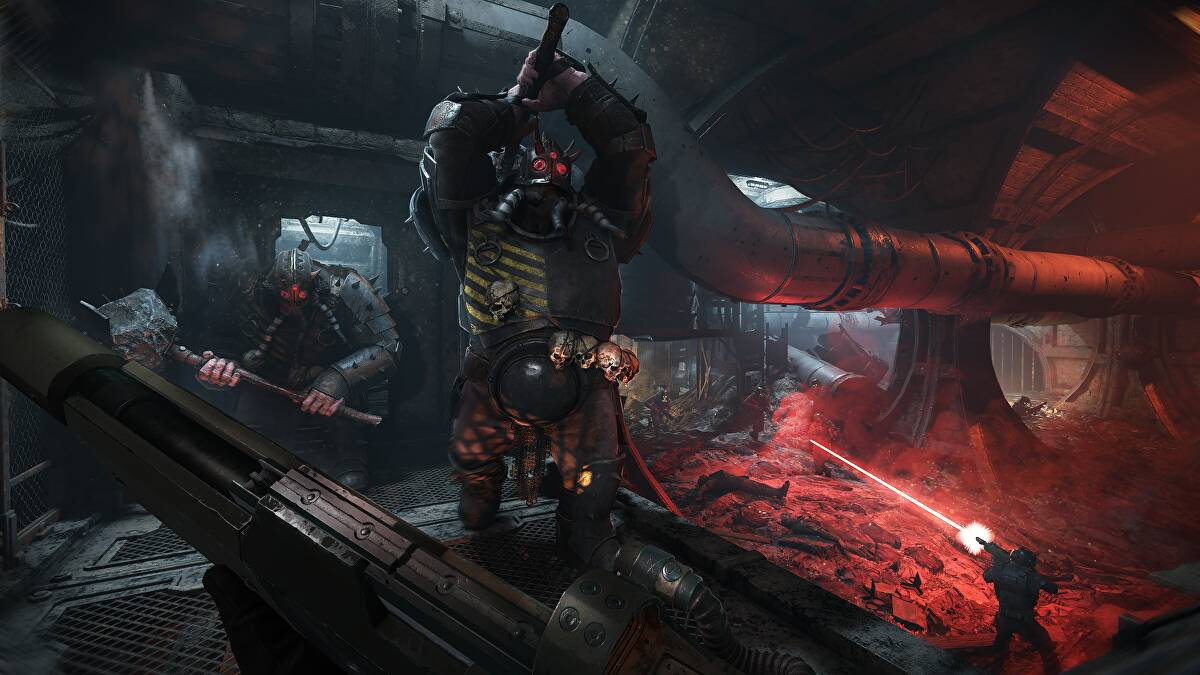
Bosses
Bosses are the most powerful enemy type in Darktide, and you will normally only encounter one or two in a level. Assassination missions will have a named boss at the end of the level whom you need to defeat in order to complete the level.
While it's technically possible for very skilled players to take out a boss by themselves, there is little room for error and it's always a good idea to use teamwork to take them down.
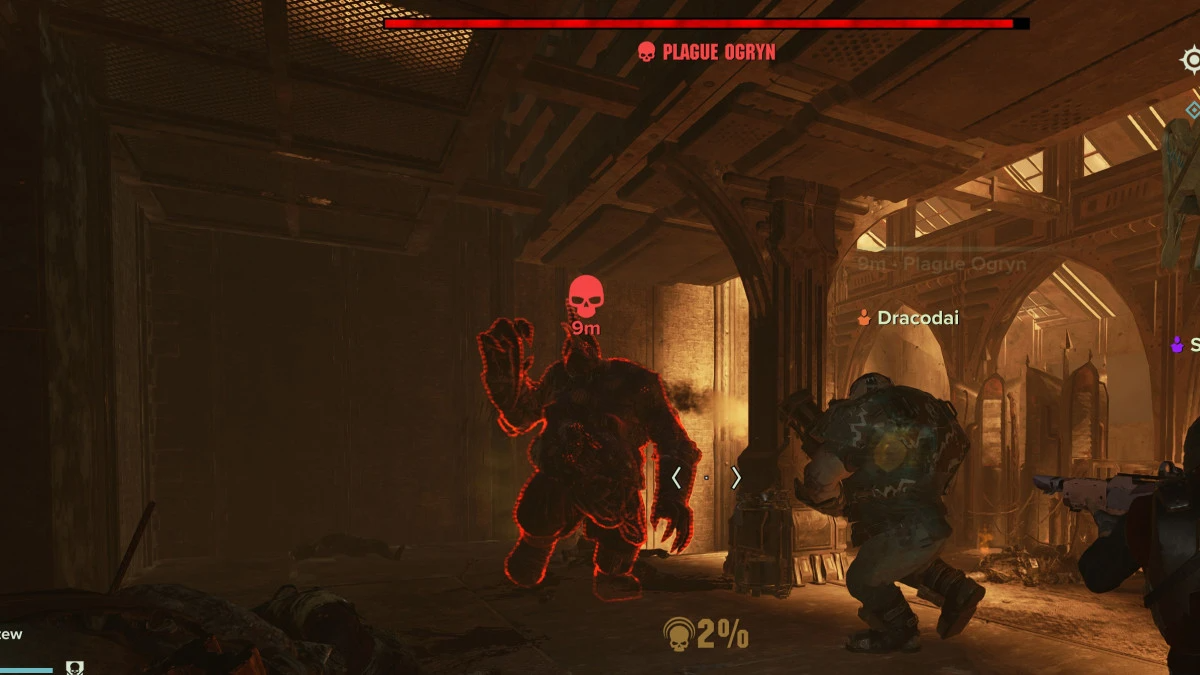
Plague Ogryn
The Plague Ogryn is large, cumbersome monster that does high damage at close quarters. You can dodge its attacks if you are quick, but this is high risk as you will take a lot of damage if hit. It's a good idea to learn the attack patterns of the boss before attempting to do this. If you're unsure, then just play defensively when the Ogryn is attacking you (blocking and dodging) and then switch to attacking when he turns to focus on someone else.
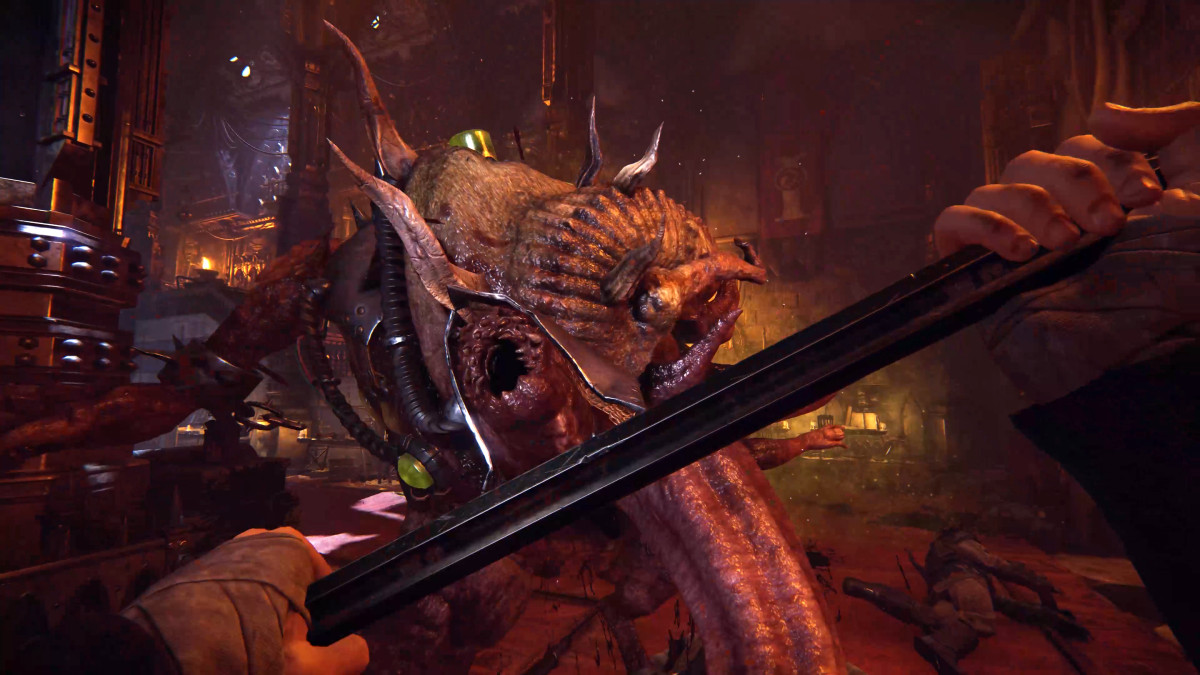
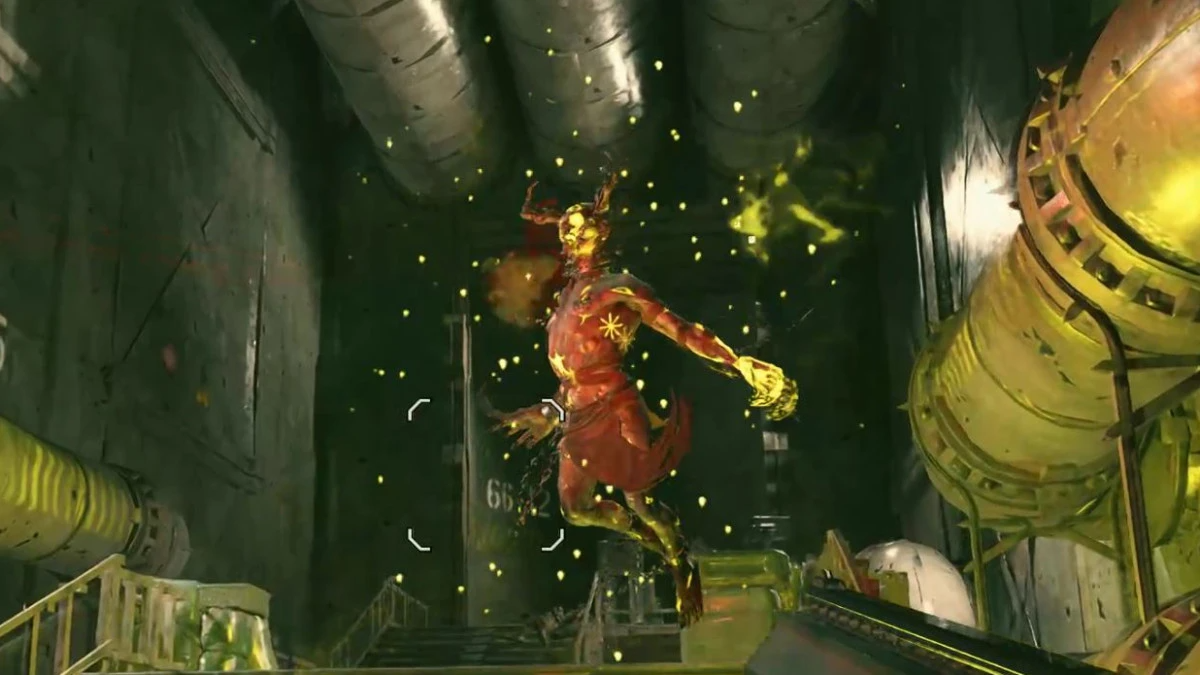
Beast of Nurgle
The Beast of Nurgle is a very large enemy that does corrupting damage to your party, turning your healthbar purple. It has a vomit AOE attack and will also try to eat players who venture too close to its huge mouth. Players who get eaten are swallowed whole and will take constant corrupting damage until they are released. Effects that are capable of staggering montrosities, such as the Ogryn charge ability, will force the boss to release a captive player. The Beast of Nurgle will often temporarily flee from the group after swallowing a player.
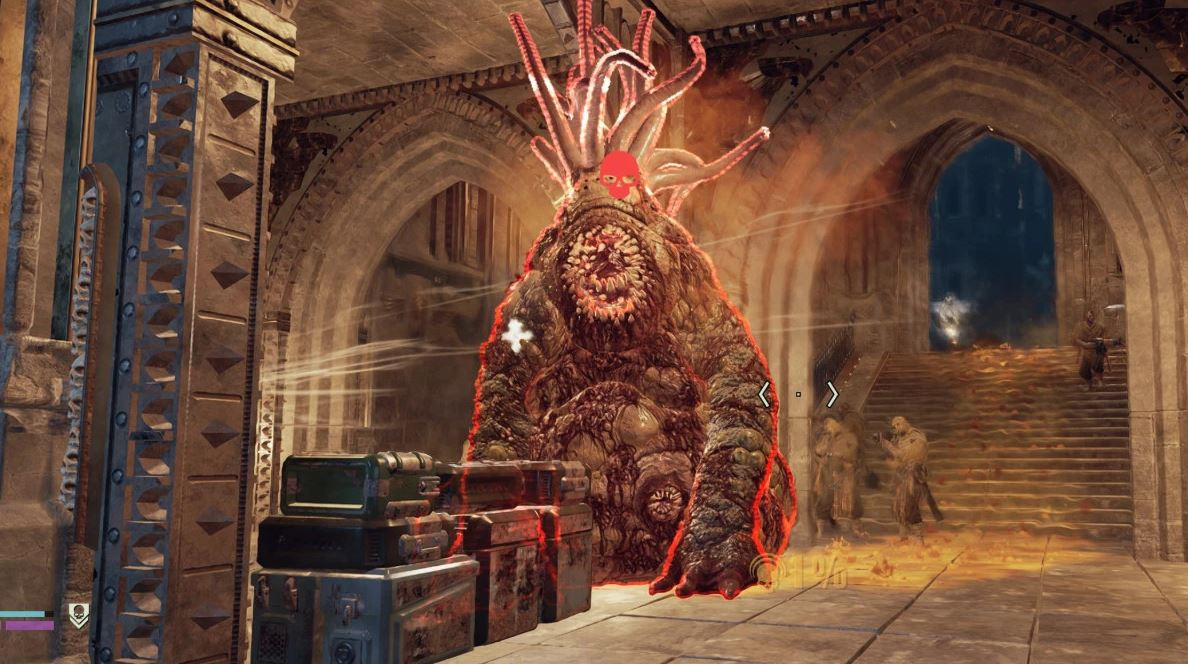
There is a large yellow bubo on the back of this enemy which is a weak spot - attacks that land here will do more damage.
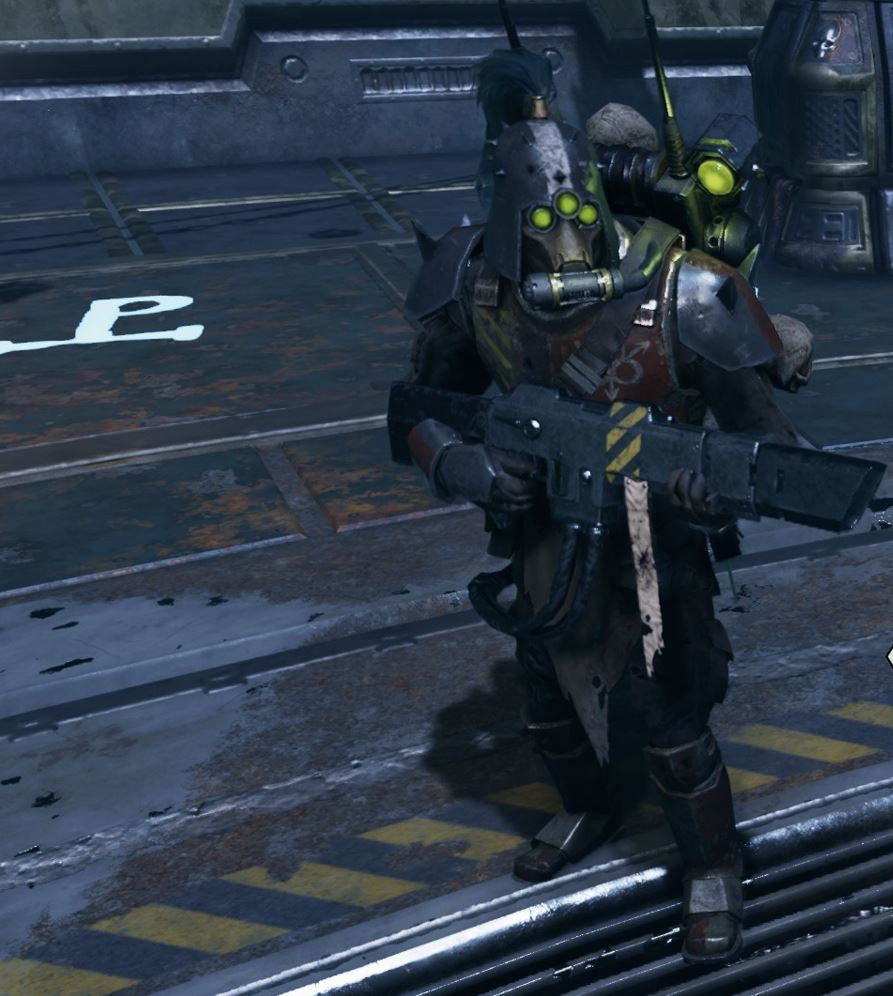
Scab Captain
Scab Captains use a mixture of powerful melee and ranged attacks to damage party members, and they also have an energy shield which protects them. When broken, the energy shield will knock back nearby players. This shield will recharge after the boss loses around 30% of his HP.
One player can keep the Scab Captain busy by engaging him in melee, disrupting his ability to shoot at people and buying time for allies to deal with any other threats. His melee attacks can all be blocked or dodged and it's quite easy to learn his attack patterns once you've fought him a couple of times. Make sure to get away from his sweeping heavy attack, which has a very wide angle of impact (it can even hit you if you're stood behind him).
Daemonhost
Daemonhosts are unlike other bosses in Darktide because they are optional encounters. They are an ambient enemy, meaning they will not "spawn in" to attack the player like other bosses, but will be waiting at a random place in the level. You often hear them before you see them, as they will whisper to themselves insanely due to the daemonic possession that they are struggling with.
They begin in a passive state, kneeling down on the ground, but if someone provokes them by firing a weapon near them, sprinting or going too close, they will switch to an "angry" state, signalled by standing up and shouting much more aggressive voicelines.
If they are provoked again while in the angry state, they will become hostile and begin attacking the player that provoked them. Hitting them with any attack may cause them to switch straight from passive to hostile.
In combat, the Daemonhost will attack the same player relentlessly with rapid hits that drain lots of stamina and are hard to dodge. When the player is downed, they will drain the life out them. If the boss is not killed before this process completed, then the victim will be put out of action and have to be rescued later in the level.
The Daemonhost will then choose a second player and do the same thing to them.
If it is still alive after killing two players, the Daemonhost will usually flee combat. This means that Daemonhosts often don't cause a party wipe on their own, but putting two players out of action leaves you very vulnerable to any further mishaps, and it's generally best to simply avoid fighting them at all.
We hope you found this list of enemies in Warhammer 40,000 Darktide useful. For more precise information about the health values of each enemy on each difficulty and their armour type, please check out our Enemy HP Guide.